We use cookies to help you navigate efficiently and perform certain functions. You will find detailed information about all cookies under each consent category below.
The cookies that are categorized as "Necessary" are stored on your browser as they are essential for enabling the basic functionalities of the site. ...
Necessary cookies are required to enable the basic features of this site, such as providing secure log-in or adjusting your consent preferences. These cookies do not store any personally identifiable data.
Functional cookies help perform certain functionalities like sharing the content of the website on social media platforms, collecting feedback, and other third-party features.
Analytical cookies are used to understand how visitors interact with the website. These cookies help provide information on metrics such as the number of visitors, bounce rate, traffic source, etc.
Performance cookies are used to understand and analyze the key performance indexes of the website which helps in delivering a better user experience for the visitors.
Advertisement cookies are used to provide visitors with customized advertisements based on the pages you visited previously and to analyze the effectiveness of the ad campaigns.
Published on 28 February 2019
Posted in
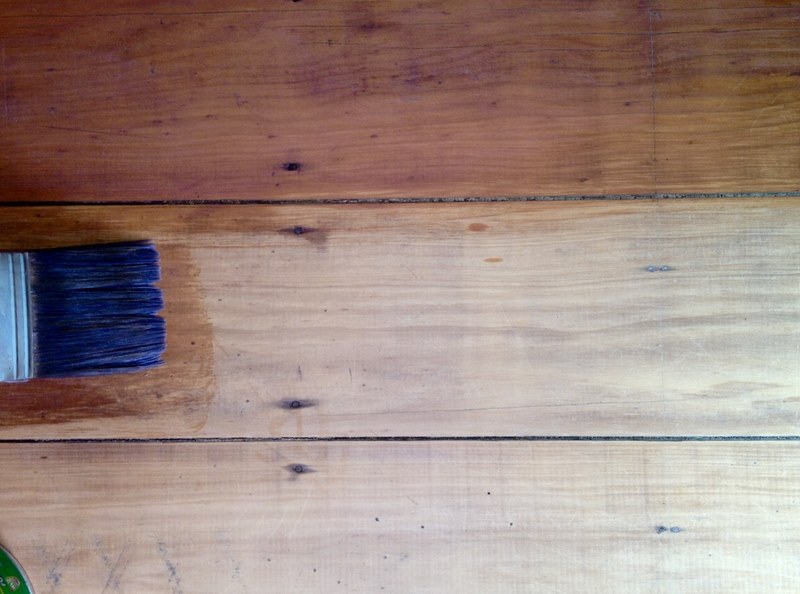
Irrespective of whether you are a professional woodworker or starting on woodworking as a hobbyist or DIYer, you’ll want to learn staining techniques. Over time, you will learn that some woods are better off without staining them. Others woods need to be stained so that the wood doesn’t look unfinished. If you use stains correctly, they can be one of the best woodworking tools available to you, providing a solution for emphasizing wood grains that are only visible from a close look. With staining, you can give any light wood the right character to blend in with or stand out from other furniture pieces in a room.
As a woodworker, you appreciate that it takes time to master using your sanding equipment and other different woodworking tools, and finding the right wood safety gear for every purpose. The same applies to wood staining. It is a craft that you have to keep learning to become a master at. While a single day for learning about wood stains and staining procedures may not be enough, this guide will help ensure that you have the basic concepts on proper wood staining on your fingertips. Ideally, that will require you to study:
Wood stains come in different types depending on the materials that the manufacturer uses to create them. Typically, most manufacturers put their wood stains into two broad categories — oil-based and water-based stain. But there are other wood stain types to consider here when specifying stains for your woodworking project. Some of these stain types include varnish stains, gel stains, lacquer stains, and water-soluble and metal complex dye stains.
Typically, it is the project that you have, and the outcome that you plan to achieve that will dictate the colour of your wood stain. If you want your work to imitate certain hardwoods, choose a stain that closely matches that wood. Examples of such wood stains include pickled oak and dark walnut stains. You also can pick a stain for general purpose staining. Such stains include classic grey, simply white, and golden pecan wood stains
Every woodwork project requires you use appropriate woodworking tools to make it successful. You also need the right wood safety gear. Before you apply your wood stain, ensure you use finishing sanding equipment to prepare the surface for staining. That will help ensure that you have an even surface on which to apply the stain. It is best you apply your stain of choice uniformly on the surface along the wood grains of a well-finished surface. Follow that with wiping off any excess stain with a stain-dipped, wrung-out, lint-free cloth. For the best results, avoid brushing to wipe this excess stain. Then give the stain some drying time before you apply the next coat or finish.
Different woodworkers use staining for varying reasons. You probably want to give that piece of wood a new look or change the look of common wood types into that of the rare hardwoods. Whichever the case, it is imperative that you find the right stain for that purpose. The above guide will make an excellent place to start. Should you need further guidance on proper wood staining, always consult an experienced wood staining professional. You will learn a lot of priceless information about how you can get the most from a wood staining project. Feel free to browse our range of wood stains on our website.
2025 ©Floor Sander Hire London. All Rights Reserved. Company No: 04545051
Web Design and Marketing by Loop Digital